 So, the ladies of the Creature Comforts blog have created an online holiday Gift catalogue called Gifted Magazine. This thing is awesome. It's full of DIY projects, tons of shopping ideas and features bios of little boutiques. And, of course, it's beautifully designed. You have GOT to check this out!
Thursday, November 4, 2010
Gifted
So, the ladies of the Creature Comforts blog have created an online holiday Gift catalogue called Gifted Magazine. This thing is awesome. It's full of DIY projects, tons of shopping ideas and features bios of little boutiques. And, of course, it's beautifully designed. You have GOT to check this out!
Flowers
 I've seen TONS of homemade flower embellishments lately. It seems there are innumerable ways to create your own paper flowers. I saw the flowers to the right on the Scrapbook Circle blog. The one below is made from a snowflake punch, but it's kind of flower-like. I saw that one on the Pink Paislee site.

The rolled-type of flower illustrated above looks good and is so easy; I've done it several times myself. This example I found on The Color Room site.

Also found on The Color Room site is the layered flower on the left made using a layer of fabric, paper and then a purchased flower.

Of course, Elizabeth Kartchner is probably the most awesome at this (see her layout to the right). Her scrapbooking blog is a veritable feast of bright frilliness and I love looking at it for the total eye-candy factor.
Tuesday, November 2, 2010
Merry and Bright


So simple, yet stylish: jars filled with colored ornaments!

Framing a wreath hanging on the wall? I wouldn't have thought of it, but I like the look.

Don't forget to decorate your lighting!

I love this simple and sweet look of buttons threaded with wire and topping a present.

Easy to make your own pedestals using candlesticks and pretty plates.

I'd definitely like to try this at Christmastime: hanging cards by twine and plain office clips.

I wouldn't exactly use this design, but I'm loving this idea of trimming the edges of my china cabinet shelves using patterned paper and double-sided tape.

A simple and cheerful way to display your holiday cards: making them into a wreath.

Put a sweet trim on your doors by using satin ribbon and dried flowers.
Monday, November 1, 2010
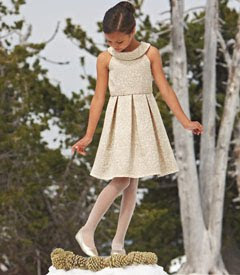
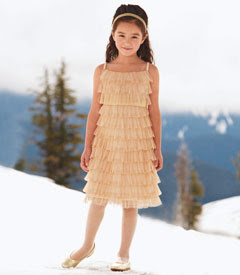
Chasing Fireflies

I got a catalogue last week from a children's boutique called Chasing Fireflies. It has got the CLASSIEST kid's dress clothes I've ever seen. They can be a bit pricey, but they sure are cute. I thought their little girls' dresses were the most adorable classy stuff ever!


Dip Dying a Lampshade
 I did this super easy project on a bland, inexpensive lampshade. All you need is:
- a box of Rit dye (take a look at the Rit Color Guide)
- a big bucket (bigger than your item to be dyed)
- water
I used an empty Scoop Away bucket and dropped the dye in. Then, I filled the bucket with water (using hot water will enable the dye to dissolve better). This created a dark-looking dye. I placed the white lampshade into the bucket and left it for 1/2 hour to an hour. How long you leave it contributes to how dark the color on your item will be. Then, I emptied a quarter of the water out of the bucket and replaced the lampshade. I left it another stretch of time before emptying another quarter to half of the remaining water and returning the lampshade to the bucket one last time. Finally, I took the lampshade out of the bucket and set it to dry emptying my bucket of dye completely. [How much water you empty each time will determine where your gradients are. I wasn't really that particular, but if you want evenly separated sections, you need to be more exact about emptying your water and do it in the same increments.]
I ended up with a light grey dip-dyed shade. I was really pleased with the results. I would have liked it a bit darker, but to achieve that I would have had to have more dye or left it in the dye longer (I'm impatient, what can I say?).

Subscribe to:
Posts (Atom)